

Installing a welded wire fence with a gate opener is a practical and rewarding project that can enhance the security and aesthetic appeal of your property. As a trusted welded wire fence supplier, I'm here to guide you through the process step by step.
Step 1: Planning and Preparation
Before you start the installation, it's crucial to plan your project carefully. First, measure the area where you want to install the fence. Consider the purpose of the fence - whether it's for security, containment, or decoration. This will help you determine the appropriate height and style of the welded wire fence.
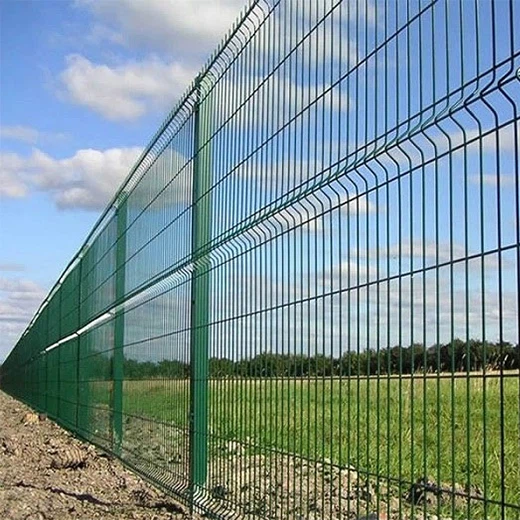
We offer a variety of options, including Coated Welded Wire Fencing, which provides excellent durability and resistance to corrosion. Metal Mesh Fencing is another popular choice, known for its strength and versatility. And if you're looking for a more robust option, Metal Welded - Wire Fencing is ideal.
Once you've chosen the right fence, mark the perimeter of the area with stakes and string. This will serve as a guide for digging the post holes. You'll also need to check for any underground utilities before you start digging to avoid any potential hazards.
Step 2: Digging Post Holes
The next step is to dig the post holes. The depth and diameter of the holes will depend on the height and type of fence you're installing. As a general rule, the holes should be at least one - third of the height of the fence post deep. For example, if your fence posts are 6 feet tall, the holes should be at least 2 feet deep.
Use a post - hole digger or an auger to dig the holes. Make sure the holes are straight and evenly spaced. The spacing between the posts will vary depending on the fence design, but typically, they should be placed 6 to 8 feet apart.
Step 3: Setting the Posts
After digging the holes, it's time to set the fence posts. Place a post in each hole and use a level to ensure it's perfectly vertical. Fill the hole with concrete, starting from the bottom and working your way up. Use a trowel to smooth the surface of the concrete.
Let the concrete cure for at least 24 to 48 hours before proceeding. This will ensure that the posts are firmly in place and can support the weight of the fence.
Step 4: Attaching the Welded Wire Fence
Once the posts are set, you can start attaching the welded wire fence. Unroll the fence along the perimeter, starting at one end. Use fence staples or clips to attach the fence to the posts. Make sure the fence is taut and there are no sagging areas.
Work your way along the fence line, attaching the fence to each post. If you need to join multiple sections of the fence, overlap the edges by at least 6 inches and secure them together with wire ties.
Step 5: Installing the Gate
The gate is an important part of your welded wire fence system. Choose a gate that matches the style and height of your fence. Measure the opening where the gate will be installed and make any necessary adjustments.
Attach the gate hinges to the gate and the fence post. Use a level to ensure the gate is hanging straight. Once the hinges are attached, test the gate to make sure it opens and closes smoothly.
Step 6: Installing the Gate Opener
Now it's time to install the gate opener. There are different types of gate openers available, including electric and hydraulic openers. Follow the manufacturer's instructions carefully when installing the gate opener.

First, mount the opener to the gate post or the gate itself. Connect the power supply and any control wires. Test the gate opener to make sure it's working properly. You may need to adjust the settings, such as the opening and closing speed, to suit your needs.
Step 7: Finishing Touches
After installing the fence and the gate opener, add any finishing touches. This could include painting or staining the fence to protect it from the elements and enhance its appearance. You can also add decorative elements, such as post caps or finials, to give your fence a more polished look.
Troubleshooting and Maintenance
Even with proper installation, you may encounter some issues with your welded wire fence and gate opener over time. Here are some common problems and solutions:
- Sagging fence: If the fence starts to sag, check the attachments to the posts. Tighten any loose staples or clips. You may also need to add additional support posts.
- Gate not opening or closing properly: Check the hinges and make sure they are lubricated. Inspect the gate opener for any loose connections or malfunctions.
- Corrosion: If you notice any signs of corrosion on the fence or the gate, clean the affected area with a wire brush and apply a rust - resistant paint or coating.
Regular maintenance is essential to keep your fence and gate opener in good condition. Inspect the fence and the gate opener regularly for any signs of damage or wear. Clean the gate opener periodically to remove any dirt or debris.
Conclusion
Installing a welded wire fence with a gate opener is a project that requires some time and effort, but the results are well worth it. By following these steps, you can create a secure and attractive fence for your property.
As a welded wire fence supplier, we're committed to providing high - quality products and excellent customer service. If you have any questions or need further assistance with your fence installation, don't hesitate to contact us. We're here to help you every step of the way. Whether you're a DIY enthusiast or a professional contractor, we have the right products and expertise to meet your needs. Reach out to us to start discussing your fence project and find the best solutions for your property.
References
- "Fence Installation Guide" - Home Improvement Magazine
- Manufacturer's instructions for welded wire fences and gate openers